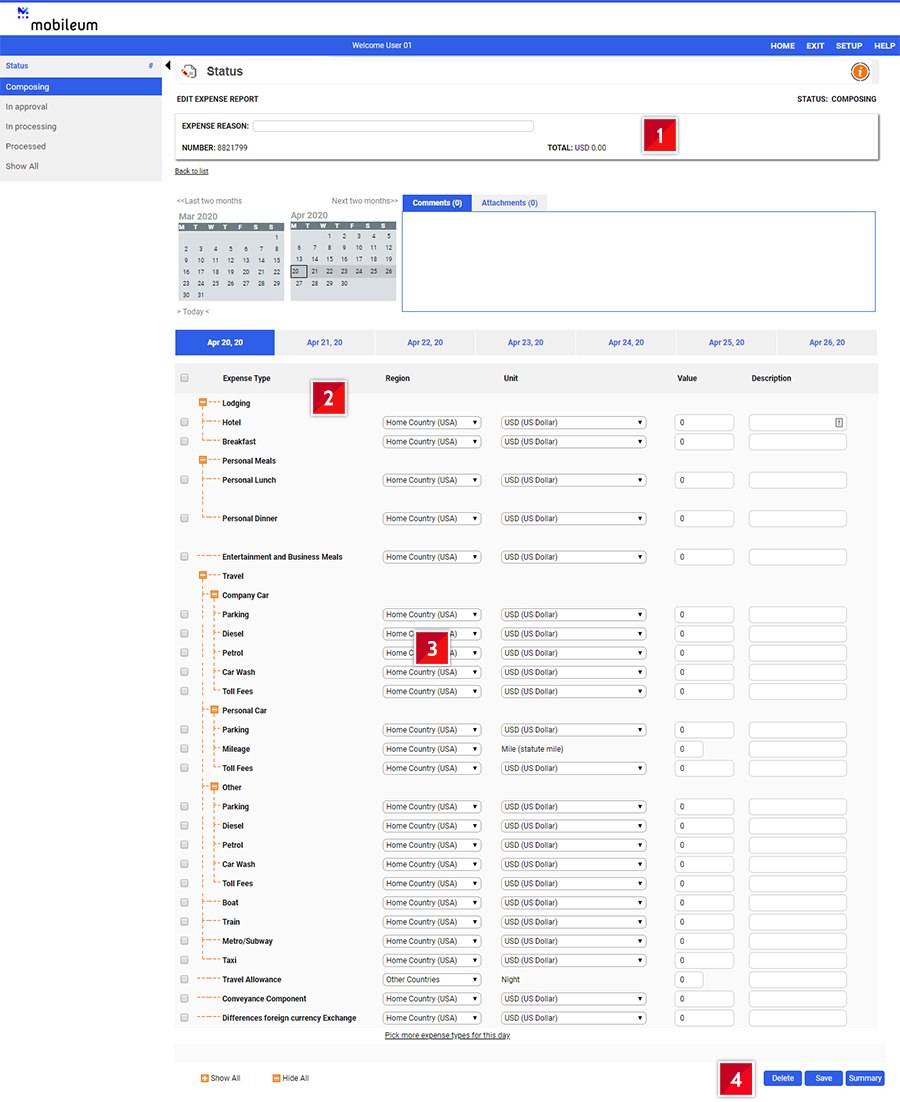
The page structure is similar to the Trip Request. However, there is a calendar for navigating and several expense types for the incurred expenses.
The main areas are:
| 1. | Document Header: expense document ID, expense reason, expense total; |
| 2. | Expense Tree: all the valid expense types for reimbursement; |
| 3. | Expense specific information: for each expense, the region, currency and value must be entered. Selected expense types may require additional information; |
| 4. | Navigation buttons: Delete to delete the selected expense line, Save to save the current document and Summary to proceed with the expense submission process. |
Tip: Users are advised to enter all expenses in their native/own currency only even if they are incurred in the foreign currency. The exchange rate available in bank/credit card statement may be used. Please don't forget to attach the statement as a supporting document. |

To add an expense, pick the expense type from the tree, select a Region and Currency and enter the value and extra fields (if any). When changing the date or proceeding to the Summary, the document is automatically saved.
Tip: When entering expenses in foreign currencies, the tool will automatically convert the value into user’s native/own currency by applying available exchange rate. If you find any difference on the amount to be reimbursed due to currency conversion, you may add an additional line item Differences foreign currency exchange (without any supporting document) in the expense report to enter difference amount and be reimbursed. |